In a world where every minute counts, our passion for art often collides with the demands of our busy lives. Time is precious, and creating art can sometimes feel like a luxury we can’t afford. But fear not! With the right arsenal of powerful tips and tricks, we can streamline our artistic process, reclaiming precious moments without sacrificing the quality of our work. Whether you’re a seasoned artist or just starting out, these human-friendly strategies will empower you to unleash your creativity more efficiently than ever before.
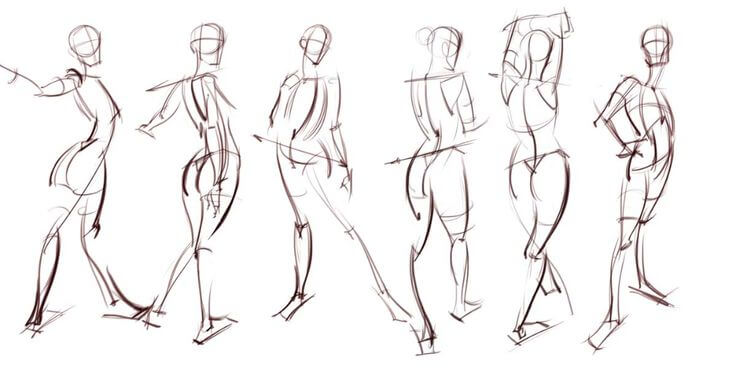
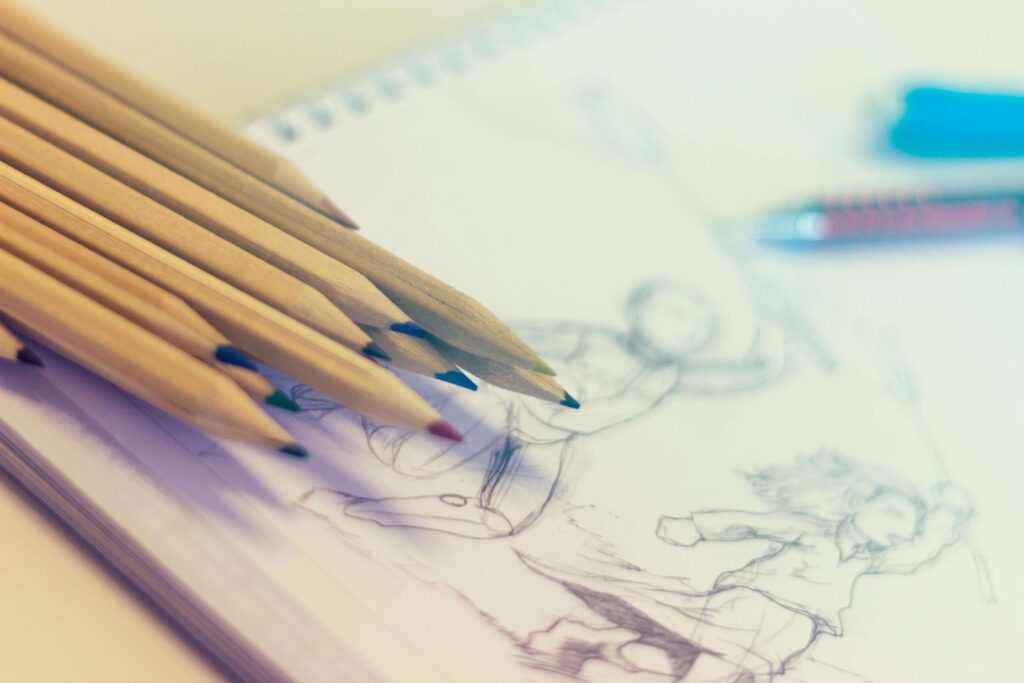
Thumbnail Skechers To Be Inspired
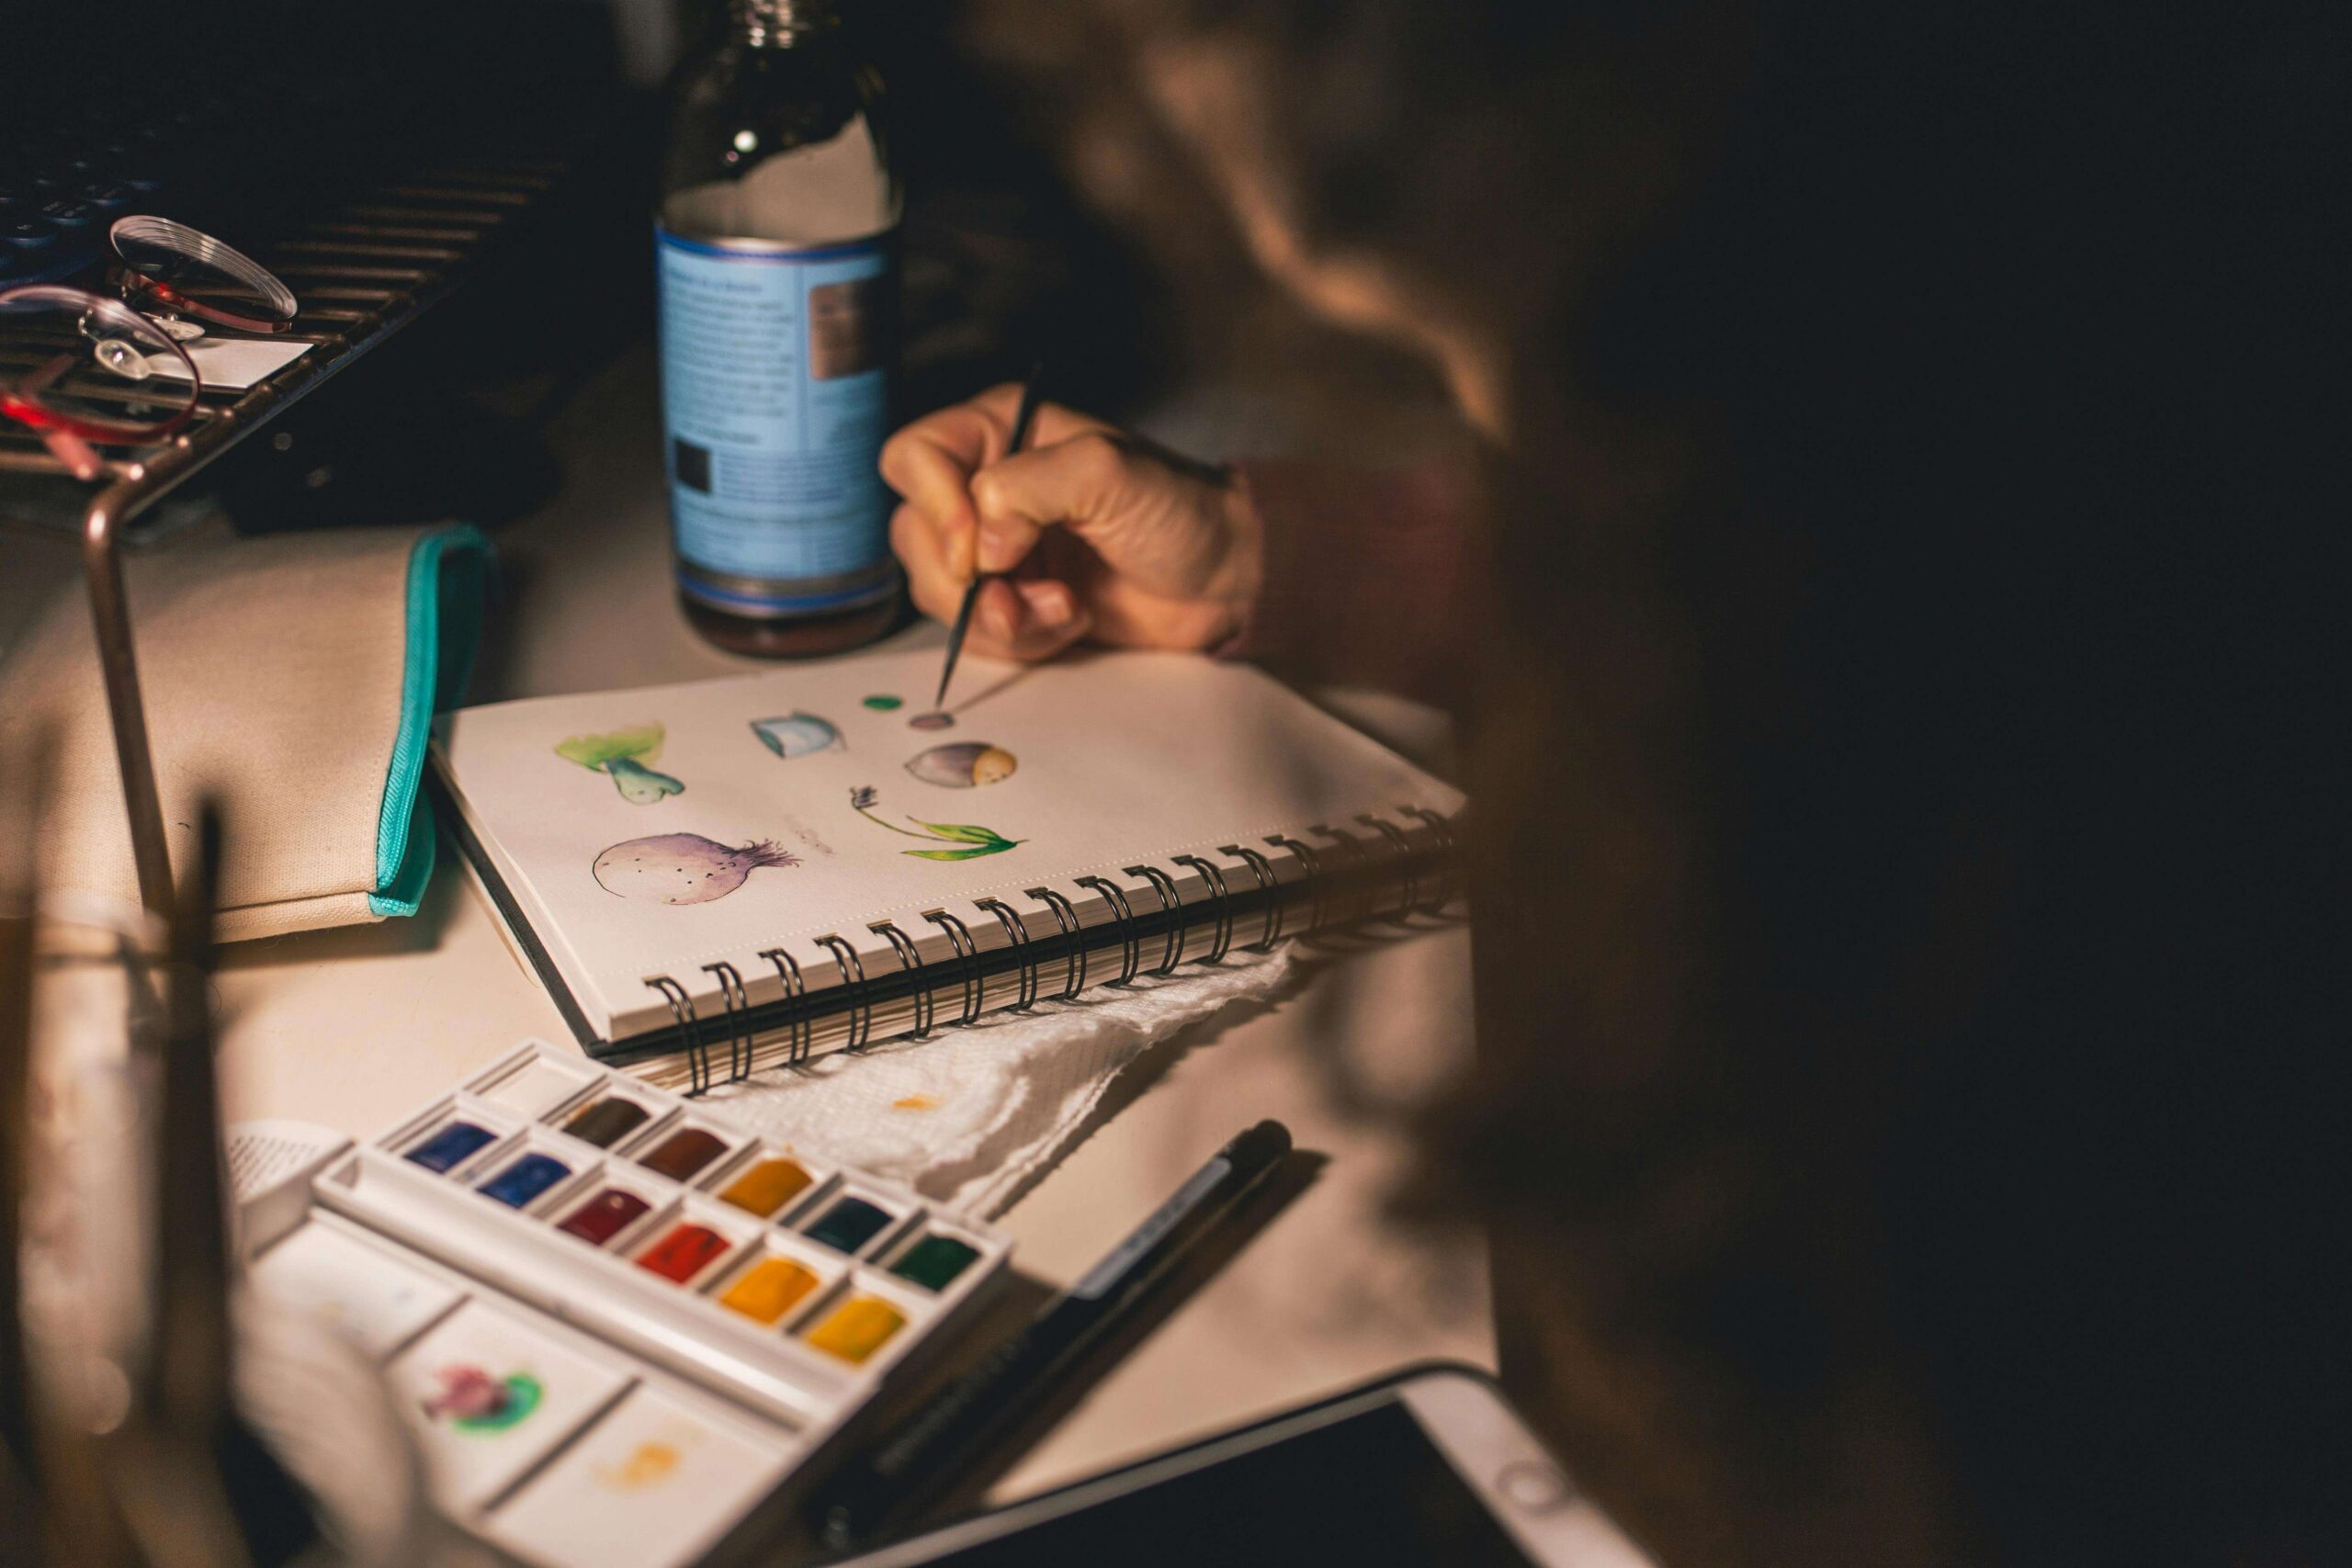
Thumbnail sketches are like the hidden gems of the art world, often overlooked but incredibly valuable. They might seem small and insignificant at first glance, but their importance in the creative process cannot be overstated. Thumbnail sketches serve as the powerhouse of ideation, allowing artists to explore countless ideas rapidly and efficiently.
These miniature masterpieces provide a quick and low-pressure way to experiment with compositions, layouts, and concepts. By condensing ideas into small, thumbnail-sized sketches, artists can quickly sift through various possibilities without investing too much time or effort. This rapid iteration process is invaluable for generating fresh ideas and refining concepts before committing to a larger, more detailed artwork.
Furthermore, thumbnail sketches help artists overcome creative blocks and indecision. When faced with a blank canvas or a daunting project, starting small with thumbnail sketches can alleviate the pressure and kickstart the creative flow. By breaking down the creative process into bite-sized chunks, artists can tackle complex ideas one step at a time, gradually building momentum and confidence along the way.
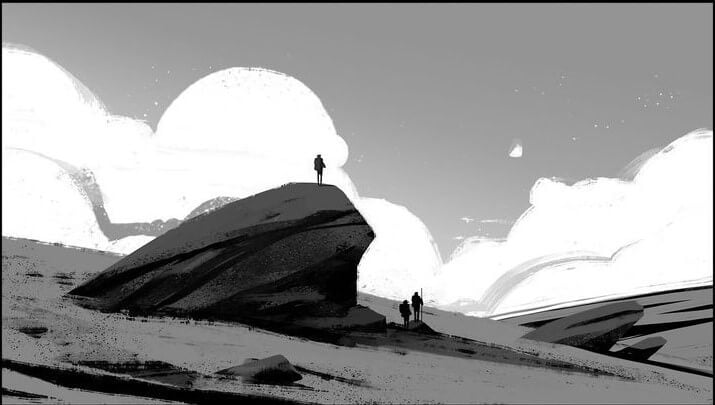
Start simple To Be Complex
Starting simple in drawing is the gateway to unlocking your creative potential and building a solid foundation for artistic growth. Whether you’re a beginner or a seasoned artist, beginning with simple subjects and techniques lays the groundwork for more complex creations down the road.
By focusing on simple shapes, such as circles, squares, and triangles, you can train your eye to observe and replicate basic forms accurately. These fundamental shapes serve as building blocks for more intricate drawings and provide a solid framework for understanding proportions and perspective.
Moreover, starting with simple subjects, such as still life arrangements or basic landscapes, allows you to practice fundamental skills like shading, line work, and texture without feeling overwhelmed. Beginning with uncomplicated subjects gives you the confidence to experiment and make mistakes without fear of failure.
In addition, embracing simplicity in your drawing process encourages mindfulness and presence in the moment. Instead of getting caught up in the details, simplifying your approach allows you to focus on capturing the essence of your subject and conveying its essential qualities.
Ultimately, starting simple in drawing sets you on a path of continuous improvement and artistic development. As you master the basics and gain confidence in your abilities, you’ll be better equipped to tackle more complex challenges and express your creativity with greater clarity and precision.
Don’t focus on every detail
When beginning your journey in drawing, it’s crucial to resist the urge to fixate on every minute detail. Instead, embrace a mindset of simplicity and focus on capturing the essence of your subject. By relinquishing the pressure to meticulously render every aspect, you free yourself to explore broader strokes and gestures that convey the overall form and feeling.
Think of your drawing process as a series of deliberate simplifications rather than an exhaustive catalog of intricacies. Break down your subject into its basic components, identifying the key shapes, lines, and values that define its essence. By distilling complex forms into simpler elements, you not only streamline your approach but also gain a deeper understanding of the underlying structure.
Moreover, allowing space for interpretation and suggestion in your drawings fosters a sense of spontaneity and creativity. Rather than striving for photographic accuracy, aim to capture the mood, energy, or narrative of your subject. Embrace imperfections as opportunities for expression, letting your marks convey emotion and personality.
Remember, the beauty of art lies in its ability to evoke feeling and provoke thought, not in its slavish adherence to realism. By embracing simplicity and embracing the freedom to interpret, you’ll discover a more authentic and personal voice in your drawings.
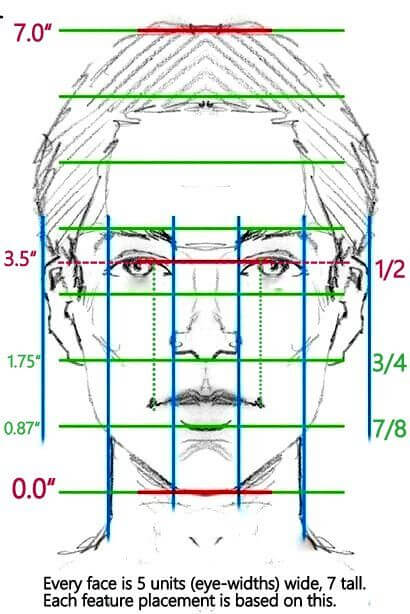
Don’t draw every guideline
In the realm of drawing, less can indeed be more. Instead of meticulously plotting every guideline, focus only on those that are essential for capturing the structure and proportions of your subject. By adopting a selective approach to guidelines, you streamline your drawing process and avoid getting bogged down in unnecessary detail.
Think of guidelines as strategic signposts rather than rigid boundaries. Identify the key elements that will guide your drawing and use them sparingly to establish the framework of your composition. These may include major landmarks such as the horizon line, vanishing points, or key points of alignment and symmetry.
By prioritizing the most critical guidelines, you maintain clarity and coherence in your drawing while leaving room for spontaneity and interpretation. Allow yourself the freedom to deviate from strict adherence to guidelines, trusting your intuition and artistic instincts to guide your hand.
Moreover, embracing a more minimalist approach to guidelines fosters a sense of confidence and fluidity in your drawing process. Rather than feeling constrained by an overwhelming array of lines, you can focus on capturing the essence and energy of your subject with greater clarity and expressiveness.
In essence, by drawing only the guidelines you need, you strike a delicate balance between structure and spontaneity, allowing your creativity to flourish while maintaining a solid foundation for your artistic vision.
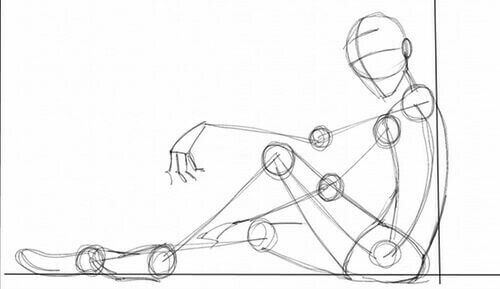
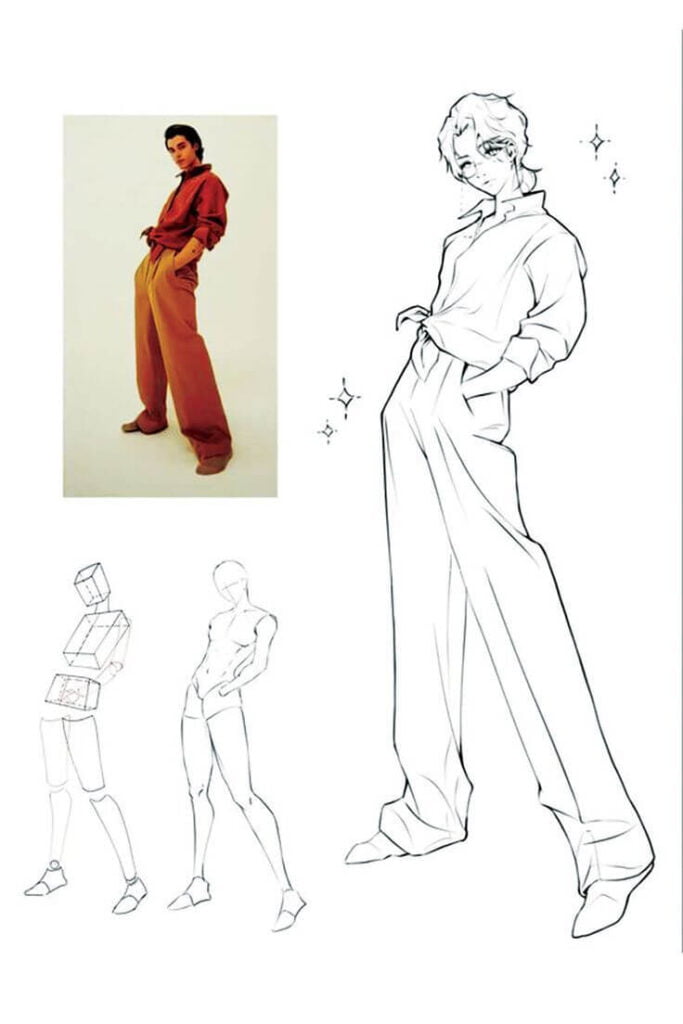
Use gesture to create good characters
Gesture drawing is a powerful tool for creating dynamic and expressive characters that leap off the page. Instead of focusing solely on details, gesture drawing emphasizes capturing the overall movement, energy, and personality of your subject in quick, fluid strokes.
Start by observing your subject and identifying its primary action or pose. Whether it’s a person, animal, or imaginary creature, look for the dominant lines of action that define its movement and attitude. These lines serve as the backbone of your gesture drawing, providing a strong foundation for building your character.
As you sketch, prioritize spontaneity and rhythm over precision. Use loose, gestural lines to convey the flow and rhythm of movement, paying attention to the relationship between different parts of the body. Focus on capturing the essence of your character’s gesture rather than getting bogged down in details.
Don’t be afraid to exaggerate and embellish the gesture to enhance its impact and personality. Emphasize dynamic poses, exaggerated expressions, and distinctive gestures to imbue your characters with life and vitality.
Furthermore, experiment with different drawing tools and techniques to add depth and texture to your gesture drawings. Whether you prefer pen and ink, charcoal, or digital brushes, each medium offers unique opportunities for expression and experimentation.
Finally, practice regularly and observe from life whenever possible. Gesture drawing is a skill that improves with time and experience, so don’t be discouraged if your initial attempts don’t turn out as you’d hoped. Keep experimenting, pushing your boundaries, and refining your technique, and you’ll soon discover the magic of creating compelling characters through gesture drawing.
Use reference images
Using reference images is a fantastic way to enhance your gesture drawing and create compelling characters with authenticity and realism. When selecting reference images, look for poses, expressions, and movements that align with the character you want to create. Whether you’re drawing humans, animals, or fantasy creatures, reference images provide invaluable insight into anatomy, proportions, and dynamics.
Once you have chosen your reference image, take the time to study it carefully. Observe the lines of action, the distribution of weight, and the subtle nuances of movement and expression. Pay attention to how different body parts interact and how they convey emotion and personality.
As you begin your gesture drawing, use the reference image as a guide to capture the overall pose and gesture of your character. Start with loose, gestural lines to establish the basic structure and flow of movement, then gradually refine your drawing with more detail and precision.
While referencing the image, don’t feel constrained to replicate it exactly. Use the reference as a starting point for your own interpretation, allowing room for creativity and imagination. Feel free to exaggerate certain features or adjust the pose to better suit your character’s personality and narrative.
Moreover, don’t limit yourself to a single reference image. Explore different angles, perspectives, and poses to enrich your understanding and capture the essence of your character from various viewpoints.
Finally, remember that reference images are meant to inspire and inform, not dictate your creativity. Use them as tools to enhance your drawing process and push your skills to new heights while infusing your characters with depth, realism, and personality.
Train Muscle memory
Muscle memory in drawing is akin to a silent partner, honing your skills through repetition. By practicing strokes, lines, and techniques repeatedly, your muscles become finely attuned to the movements required. This allows for quicker, more precise execution of artistic elements. Over time, muscle memory enables fluidity in drawing, freeing your mind to focus on creativity rather than mechanics. Consistent practice cultivates this memory, turning once-challenging tasks into second nature. Embrace repetition as a pathway to mastery, understanding that each stroke reinforces your artistic fluency and brings you closer to realizing your creative vision with greater ease and confidence.
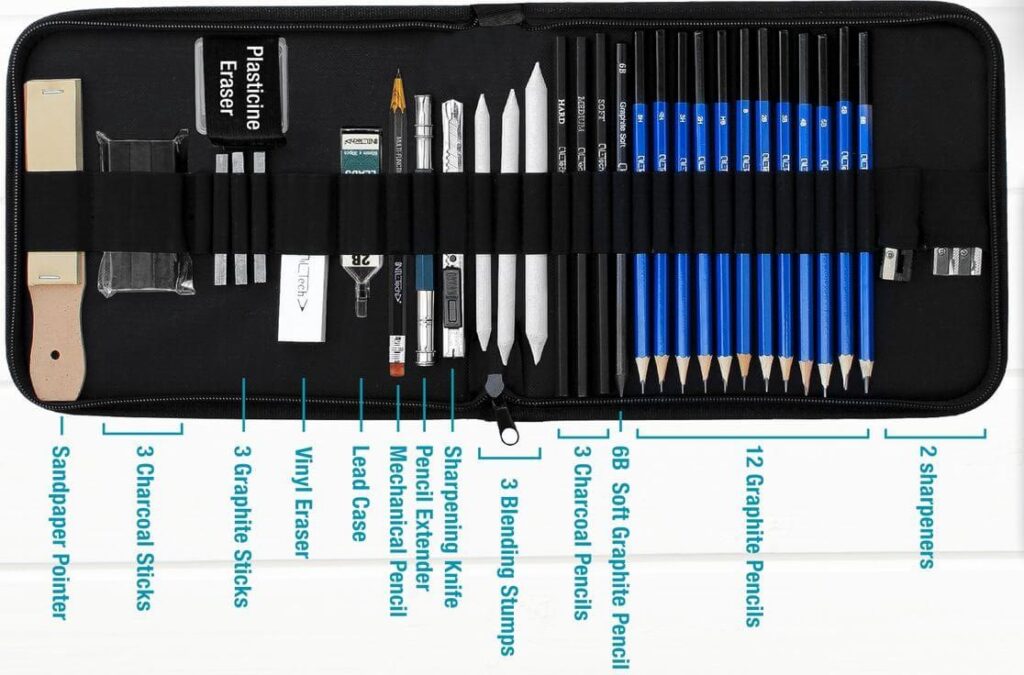
Experiment with the tools
Exploring new tools and techniques can indeed accelerate your drawing process, and using a blending stump is a prime example. While blending by hand can be effective, employing a blending stump offers several advantages for efficiency and precision.
Firstly, blending stumps are specifically designed for the task of blending and smudging graphite, charcoal, or other drawing mediums. Their cylindrical shape and compressed paper construction create a smooth, consistent surface, allowing for seamless blending without leaving behind fingerprints or smudges.
Additionally, blending stumps provide greater control and accuracy compared to blending by hand. Their pointed tips enable you to target specific areas and achieve subtle transitions between tones, textures, and colors with ease. This precision is especially valuable when working on detailed or intricate drawings, where every stroke counts.
Moreover, using a blending stump reduces the risk of accidentally smudging or smearing your drawing with oils or moisture from your hand. This can be particularly beneficial when working with delicate or sensitive paper surfaces that are prone to damage.
Lastly, blending stumps are reusable and durable, making them a cost-effective investment for artists looking to streamline their drawing process. With proper care and maintenance, a blending stump can last for multiple projects, providing consistent results time and time again.
In summary, while blending by hand can be effective, incorporating a blending stump into your toolkit offers numerous benefits for speeding up your drawing process and achieving professional-quality results with greater efficiency and precision.
Set times and challengers
Setting specific time limits and challenges can be a powerful way to enhance your drawing skills, boost creativity, and accelerate your artistic growth. Here’s how:
- 1.Time Limits: By imposing time constraints on your drawing sessions, you challenge yourself to work quickly and decisively. Set a timer for a certain duration, such as 5, 10, or 20 minutes, and see how much you can accomplish within that timeframe. This not only encourages you to prioritize essential details but also trains you to work efficiently without getting bogged down in perfectionism.
- 2 Daily Challenges: Participating in daily drawing challenges or prompts can provide structure and motivation for your practice sessions. Websites and social media platforms often host themed challenges where artists create artwork based on specific prompts each day. These challenges encourage you to think outside the box, explore new subjects, and experiment with different styles and techniques.
- 3.Speed Drawing: Challenge yourself to complete drawings within a set time limit, such as 60 seconds or 3 minutes. This rapid-fire approach forces you to work on instinct and intuition, trusting your initial impulses rather than overthinking each mark. Speed drawing exercises are excellent for loosening up, improving hand-eye coordination, and capturing the essence of your subject with speed and efficiency.
- 4. Weekly Projects: Dedicate a certain day of the week to tackling more extensive drawing projects or studies. Set aside a few hours to delve deeply into a particular subject or technique, allowing yourself the time and space to explore and refine your ideas. Weekly projects provide a balance between short-term challenges and long-term growth, enabling you to dive deeper into your artistic practice.
- 5. Collaborative Challenges: Partnering with fellow artists or joining online communities can add an extra layer of accountability and camaraderie to your drawing challenges. Collaborate on themed projects, share progress updates, and provide feedback to one another. This collaborative approach fosters a sense of community and support, motivating you to push your creative boundaries and achieve new heights in your artwork.
Incorporating time limits and challenges into your drawing practice not only boosts productivity but also cultivates discipline, creativity, and resilience. Whether you’re a beginner or an experienced artist, embracing these challenges can inspire growth, spark innovation, and reignite your passion for drawing.
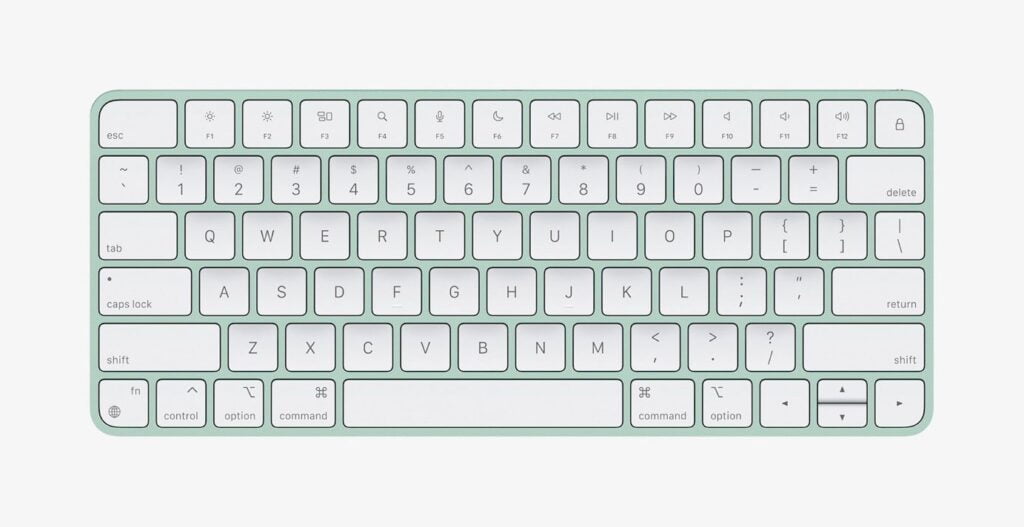
Use short keys
Using keyboard shortcuts, or hotkeys, can significantly speed up your drawing process by allowing you to access essential tools and functions with a simple keystroke. Here are some common keyboard shortcuts you can use in popular drawing software like Adobe Photoshop or Procreate.
- 1. Ctrl + Z (Cmd + Z on Mac): Undo the last action. This shortcut allows you to quickly backtrack if you make a mistake.
- 2. Ctrl + Y (Cmd + Y on Mac): Redo the last action that was undone.
- 3. Ctrl + C (Cmd + C on Mac): Copy the selected area or object.
- 4. Ctrl + V (Cmd + V on Mac): Paste the copied area or object.
- 5. Ctrl + S (Cmd + S on Mac): Save your work. It’s essential to save your progress regularly to avoid losing any changes.
- 6. Ctrl + A (Cmd + A on Mac): Select all elements on the canvas.
- 7. Ctrl + D (Cmd + D on Mac): Deselect any currently selected elements.
- 8. Ctrl + T (Cmd + T on Mac): Transform the selected element. This shortcut allows you to resize, rotate, or skew an object.
- 9. Ctrl + Shift + N (Cmd + Shift + N on Mac): Create a new layer. Working with layers is crucial in digital drawing, allowing you to organize your artwork efficiently.
- 10. Ctrl + Shift + Alt + E (Cmd + Shift + Option + E on Mac): Merge all visible layers onto a new layer. This shortcut is useful for consolidating your artwork while preserving the original layers.
- 11. B: Switch to the Brush tool. The Brush tool is one of the most commonly used tools in drawing software.
- 12. E: Switch to the Eraser tool. Quickly switch between drawing and erasing without interrupting your workflow.
- 13. G: Switch to the Gradient tool. This tool allows you to create smooth color transitions.
- 14. Ctrl + Tilde (~): Toggle between different open documents or tabs.
- 15 .Spacebar: Hold down the Spacebar to temporarily switch to the Hand tool for panning or navigating around the canvas.
By mastering these keyboard shortcuts and customizing them to suit your workflow, you can streamline your drawing process and work more efficiently, allowing you to focus on unleashing your creativity.
Art hacks
Unleashing your creativity often involves breaking free from conventional methods and exploring innovative approaches. In the world of art, where every stroke tells a story and every hue evokes emotion, discovering clever hacks can revolutionize your process. From using white charcoal on dark paper to harnessing the power of DIY texture tools, these ingenious tricks open new avenues for self-expression and artistic exploration. Whether you’re a seasoned artist or just beginning your journey, incorporating art hacks into your practice can ignite inspiration, streamline your workflow, and elevate your creations to new heights. So, grab your brushes, pencils, and palette knives, and join us on a journey of discovery as we unveil the secrets behind unlocking your artistic potential through the magic of art hacks.
In conclusion, navigating the intersection of art and time constraints requires ingenuity and resourcefulness. By embracing powerful tips and tricks, such as thumbnail sketching, starting simple, leveraging muscle memory, and utilizing shortcuts, artists can unlock new levels of efficiency and creativity in their work. These human-friendly strategies empower artists of all levels to reclaim precious moments, streamline their processes, and elevate their artistic endeavors to new heights. So, armed with these art hacks, let’s embark on a journey of exploration and discovery, where every stroke becomes a testament to our ingenuity and
